Chatbots
In this article, you’ll learn how to build a chatbot powered by a Large Language Model (LLM) shiny and chatlas.
Get started
Choose a template
Pick from the following LLM providers below to start your chatbot. Copy & paste the relevant shiny create terminal command to get the relevant source files on your machine.
shiny create --template chat-ai-ollamashiny create --template chat-ai-anthropicshiny create --template chat-ai-openaishiny create --template chat-ai-geminishiny create --template chat-ai-anthropic-awsshiny create --template chat-ai-azure-openaishiny create --template chat-ai-langchainchatlas supports a wide variety of LLM providers including Vertex, Snowflake, Groq, Perplexity, and more. In this case, you can start from any template and swap out the chat_client with the relevant chat constructor (e.g., ChatVertex()).
If you’re not sure which provider to choose, chatlas provides a great guide to help you decide.
When you run the shiny create command, you’ll be provided with some tips on where to obtain the necessary API keys (if any) and how to securely add them to your app.
Also, if you’re not ready to sign up for a cloud provider (e.g., Anthropic, OpenAI, etc.), you can run models locally (for free!) with the Ollama template. This is a great way to get started and learn about LLMs without any cost, and without sharing your data with a cloud provider.
Once your credentials (if any) are in place, run the app. Congrats, you now have a streaming chat interface powered by an LLM of your choice! 🎉

Chat component.Inspect the code
Go ahead and open the app.py file from your template, you’ll see something roughly like this:
from chatlas import ChatOllama
from shiny.express import ui

# Might instead be ChatAnthropic, ChatOpenAI, or some other provider
chat_client = ChatOllama(model="llama3.2")

chat = ui.Chat(id="my_chat")
chat.ui()

@chat.on_user_submit
async def handle_user_input(user_input: str):
    response = await chat_client.stream_async(user_input)
    await chat.append_message_stream(response)
from chatlas import ChatOllama
from shiny import ui, App
app_ui = ui.page_fixed(
ui.chat_ui(id="my_chat")
)
def server(input):
chat = ui.Chat(id="my_chat")
chat_client = ChatOllama(model="llama3.2")
@chat.on_user_submit
async def handle_user_input(user_input: str):
response = await chat_client.stream_async(user_input)
await chat.append_message_stream(response)
app = App(app_ui, server)From here, we can see the key requirements for streaming reponses from an LLM:
- Initialize a
chat_client(e.g.,ChatOllama()) to interact with the LLM.chatlasisn’t required for this, but it’s highly recommended.
- Initialize a
Chat()instance. - Display it’s UI element with
chat.ui().- Here you can specify startup messages, customize icons, and more.
- Decorate a
@chat.on_user_submitfunction to fire when the user submits input.- Here,
chat_clientgenerates aresponsestream, which is passed along to the.append_message_stream()method for display.
- Here,
In this article, our primary focus is the UI portion of the chatbot (i.e., chat). That said, since LLM model choice and prompt design are so important for generating good responses, we’ll briefly touch on that first.
Models & prompts
With chatlas, it’s very easy to switch between the model and system prompt behind your chat_client. Just change the model and system_prompt parameters:
chat_client = ChatOllama(
  model="llama3.2",
  system_prompt="You are a helpful assistant",
)
If you’re new to programming with LLMs, we highly recommend visiting the chatlas website for guidance on where to start, choosing a model, and designing an effective system prompt.
If you’re not yet ready learn about LLMs, that’s okay! We can still dive into chat UI features without knowing much about LLMs.
Interactively experiment with different models and prompts with the playground template. It’s also a great learning resource on how to leverage reactivity for dynamic prompts and model selection.
shiny create --template chat-ai-playgroundAdd messages
On startup
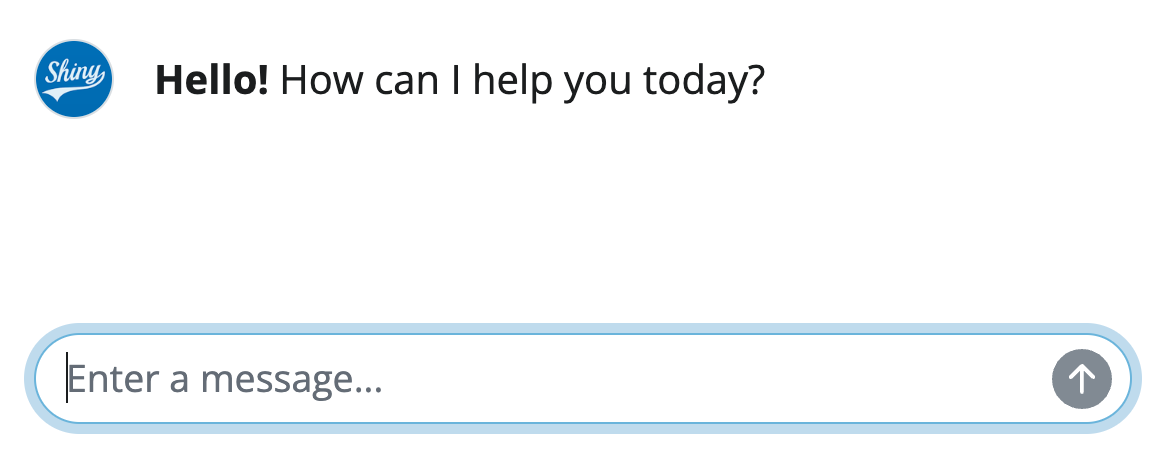
Show message(s) when the chat first loads by providing messages to chat.ui(). Messages are interpreted as markdown, so you can use markdown (or HTML) to format the text as you like.
Startup messages are a great place to introduce the chatbot with a brief description of what it can do and, optionally, some input suggestions to help the user get started quickly. Messages can also contain arbitrary Shiny UI components, so you could even include something like a tooltip to provide additional details on demand.
chat.ui(
  messages=["**Hello!** How can I help you today?"]
)
ui.chat_ui(
id="chat",
messages=["**Hello!** How can I help you today?"],
)
On user submit
Every chat instance should have a @chat.on_user_submit callback. This is where you’ll receive the user’s input and append a response to the chat. In your started template, the response stream is provided by chatlas via chat_client.stream_async(prompt). As it turns out, stream is an generator of markdown strings, and the .append_message_stream() method can work with any generator of strings. This is useful to know if you want to:
- Use another framework for reponse generation (e.g., LangChain).
- Transform the stream as it’s being generated (e.g., capitalize the response).
@chat.on_user_submit
async def _(user_input: str):
    stream = stream_generator(user_input)
    await chat.append_message_stream(stream)

# 'Wrap' the stream to capitialize the response
async def stream_generator(user_input):
    stream = await chat_client.stream_async(user_input)
    async for chunk in stream:
        yield chunk.upper()
Bookmark messages
When a Shiny app reloads, the app returns to it’s original state, unless the URL includes bookmarked state.1 Automatically updating the URL to include a bookmark of the chat state is a great way to help users return to their work if they accidentally refresh the page or unexpectedly lose their connection.
Adding bookmark support to an app generally requires some extra effort. At the very least, Shiny needs to know where and when to save state, and in some cases, how to save/restore it as well.2 The .enable_bookmarking() method makes this all a bit easier for bookmarking both the chat and chat_client instances.
from chatlas import ChatOllama
from shiny.express import ui

chat_client = ChatOllama(model="llama3.2")

chat = ui.Chat(id="chat")
chat.ui(messages=["Welcome!"])

chat.enable_bookmarking(
    chat_client,
    bookmark_store="url", # or "server"
    bookmark_on="response", # or None
)
from chatlas import ChatOllama
from shiny import ui, App
app_ui = ui.page_fixed(
ui.chat_ui(id="chat", messages=["Welcome!"])
)
def server(input):
chat_client = ChatOllama(model="llama3.2")
chat = ui.Chat(id="chat")
chat.enable_bookmarking(
chat_client,
bookmark_on="response", # or None
)
app = App(app_ui, server, bookmark_store="url")Adding this .enable_bookmarking() call handles the where, when, and how of bookmarking chat state:
- Where (
store)"url"store the state in the URL."server"store the state on the server. Consider this over"url"if you want to support a large amount of state, or have other bookmark state that can’t be serialized to JSON.
- When (
bookmark_on)"response": triggers a bookmark when an"assistant"response is appended.None: don’t trigger a bookmark. This assumes you’ll be triggering bookmarks through other means (e.g., a button).
- How is handled automatically by registering the relevant
on_bookmarkandon_restorecallbacks.
Also note that when .enable_bookmarking() triggers a bookmark for you, it’ll also update the URL query string to include the bookmark state. This way, when the user unexpectedly loses connection, they can load the current URL to restore the chat state, or go back to the original URL to start over.
Layout
Fill
Fill the page on desktop (and mobile) with the fillable=True (and fillable_mobile=True) page options. This way, the input stays anchored to the bottom of the page, and the chat fills the remaining space.
from shiny.express import ui

ui.page_opts(
  fillable=True,
  fillable_mobile=True,
)

chat = ui.Chat(id="chat")
chat.ui(messages=["Welcome!"])
from shiny import ui, App
app_ui = ui.page_fillable(
ui.chat_ui(id="chat", messages=["Welcome!"]),
fillable_mobile=True,
)
def server(input):
chat = ui.Chat(id="chat")
app = App(app_ui, server)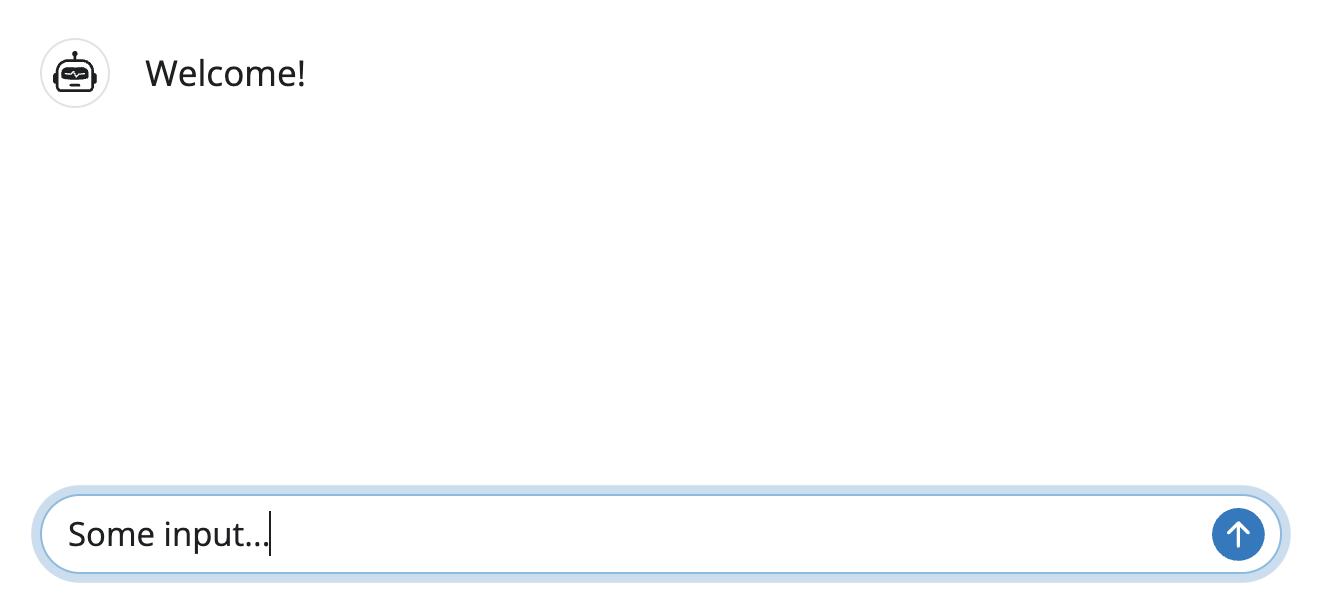
Sidebar
To have the chat fill a sidebar, set height to 100% on both the sidebar and chat.
from shiny.express import ui

chat = ui.Chat(id="chat")

with ui.sidebar(width=300, style="height:100%"):
    chat.ui(height="100%", messages=["Welcome!"])

"Main content"
from shiny import ui, App
app_ui = ui.page_sidebar(
ui.sidebar(
ui.chat_ui(id="chat", messages=["Welcome!"], height="100%"),
width=300, style="height:100%"
),
"Main content",
)
def server(input):
chat = ui.Chat(id="chat")
app = App(app_ui, server)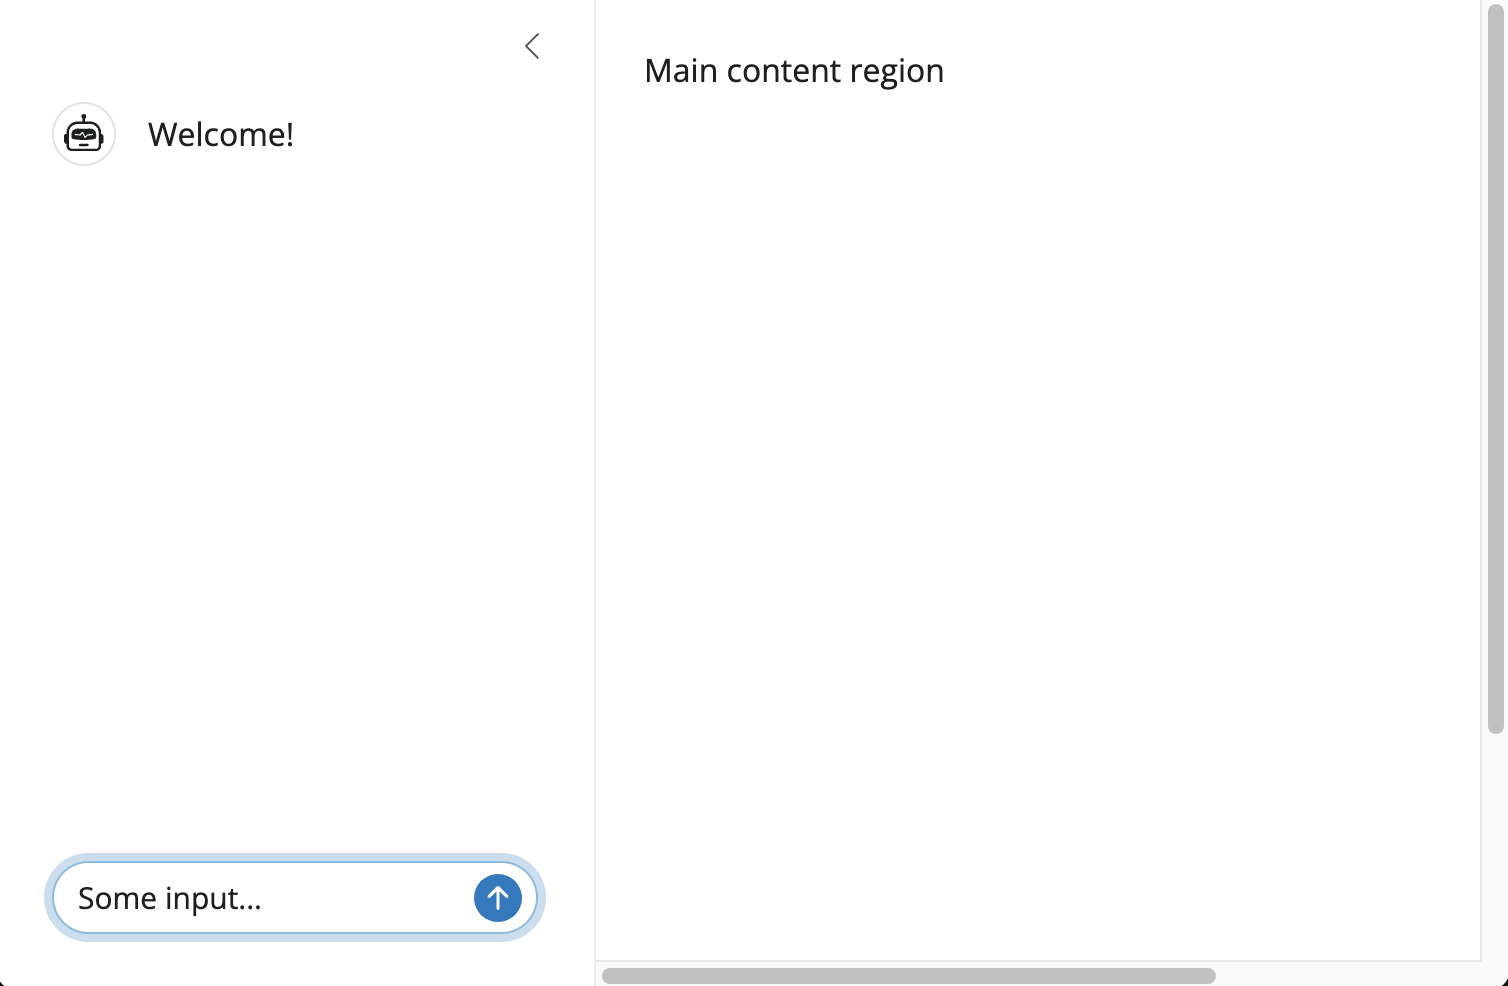
Card layout
Another useful UI pattern is to embed the chat component inside a ui.card(). If nothing else, this will help visually separate the chat from the rest of the app. It also provides a natural place to provide a header (with perhaps a tooltip with more info about your chatbot). Cards also come with other handy features like full_screen=True to make the chat full-screen when embedded inside a larger app.
from shiny.express import ui
from faicons import icon_svg

ui.page_opts(
    fillable=True,
    fillable_mobile=True,
    class_="bg-light",
)

chat = ui.Chat(id="chat")

with ui.card():
    with ui.card_header(class_="d-flex justify-content-between align-items-center"):
        "Welcome to Posit chat"
        with ui.tooltip():
            icon_svg("question")
            "This chat is brought to you by Posit."
    chat.ui(
        messages=["Hello! How can I help you today?"]
    )
from shiny import ui, App
app_ui = ui.page_fillable(
ui.card(
ui.card_header(
"Welcome to Posit chat",
ui.tooltip(
icon_svg("question"),
"This chat is brought to you by Posit."
),
class_="d-flex justify-content-between align-items-center"
),
ui.chat_ui(
id="chat",
messages=["Hello! How can I help you today?"],
),
),
fillable_mobile=True,
class_="bg-light",
)
def server(input):
chat = ui.Chat(id="chat")
app = App(app_ui, server)
Theming
Custom CSS
To customize main colors and fonts, provide a ui.Theme() to the theme page option. Theming customization may be done directly on ui.Theme() (e.g., .add_defaults()) and/or created from a brand-yml file and applied with ui.Theme().from_brand(). Note you can also introduce a dark mode toggle with ui.input_dark_mode().
from shiny.express import ui

ui.page_opts(
    theme=ui.Theme().add_defaults(primary="#a855f7"),
    title=ui.div(
        "My themed chat app",
        ui.input_dark_mode(mode="dark"),
        class_="d-flex justify-content-between w-100",
    )
)

chat = ui.Chat(id="chat")

with ui.sidebar(width=300, style="height:100%"):
    chat.ui(height="100%", messages=["Welcome!"])

"Main content region"
from shiny import ui, App
app_ui = ui.page_sidebar(
ui.sidebar(
ui.chat_ui(id="chat", messages=["Welcome!"], height="100%"),
width=300, style="height:100%"
),
"Main content region",
theme=ui.Theme().add_defaults(primary="#a855f7"), # <<
title=ui.tags.div(
"My themed chat app",
ui.input_dark_mode(mode="dark"),
class_="d-flex justify-content-between w-100",
),
)
def server(input):
chat = ui.Chat(id="chat")
app = App(app_ui, server)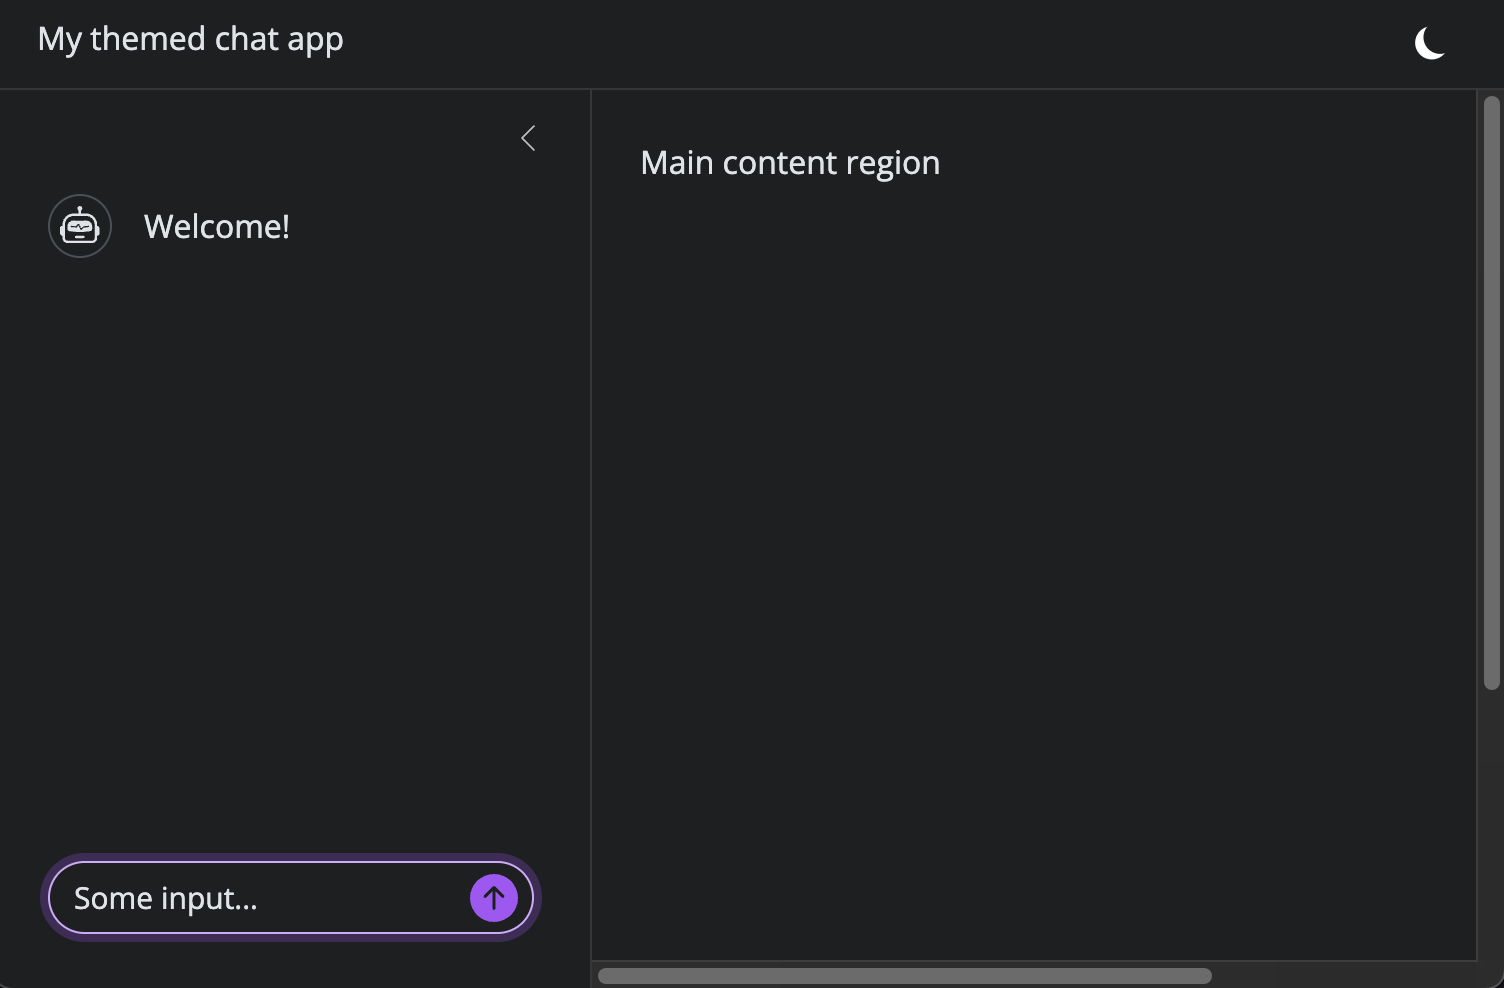
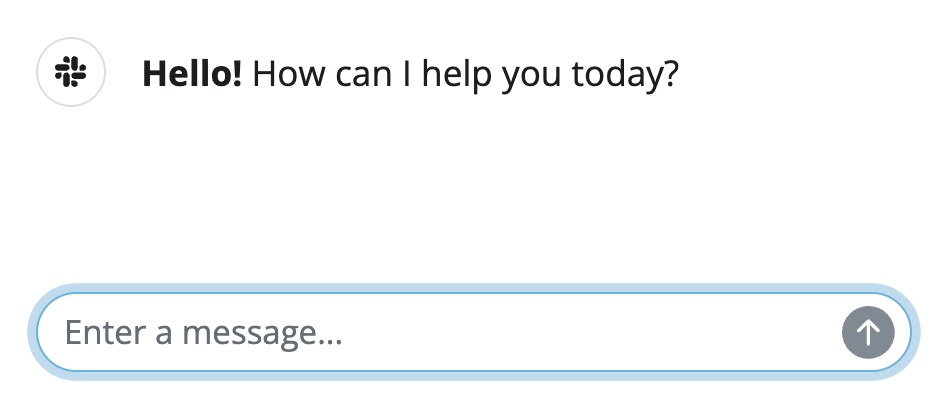
Custom icons
Customize the assistant icon by supplying HTML/SVG to icon_assistant when creating the UI element (or when appending a message). The faicons package makes it easy to do this for font awesome, but other icon libraries (e.g., Bootstrap icons, heroicons, etc.) or custom SVGs are also possible by providing inline SVGs as a string to ui.HTML().
from faicons import icon_svg

chat.ui(
  messages=["**Hello!** How can I help you today?"],
  icon_assistant=icon_svg("slack"),
)
from faicons import icon_svg
ui.chat_ui(
id="chat",
messages=["**Hello!** How can I help you today?"],
icon_assistant=icon_svg("slack"),
)
<img> icons
HTML <img> tags also work. By default, they fill their container, and may get clipped by the container’s border-radius. To scale down the image, add a icon CSS class, or border-0 to remove the border and border-radius.
from faicons import icon_svg

chat.ui(
  messages=["**Hello!** How can I help you today?"],
  icon_assistant=ui.img(
    src="https://raw.githubusercontent.com/posit-dev/py-shiny/c1445b2/tests/playwright/shiny/components/chat/icon/img/shiny.png"
  )
)
from faicons import icon_svg
ui.chat_ui(
id="chat",
messages=["**Hello!** How can I help you today?"],
icon_assistant=ui.img(
src="https://raw.githubusercontent.com/posit-dev/py-shiny/c1445b2/tests/playwright/shiny/components/chat/icon/img/shiny.png",
)
)
Recommend input
Suggest input
Help users start or continue a conversation by providing input suggestions. To create one, add a suggestion CSS class to relevant portion(s) of the message text. You can also add a submit class to make the suggestion submit the input automatically. Try clicking on the suggestions (or accessing via keyboard) below to see how they work.
#| '!! shinylive warning !!': |
#|   shinylive does not work in self-contained HTML documents.
#|   Please set `embed-resources: false` in your metadata.
#| standalone: true
#| components: [editor, viewer]
#| layout: vertical
#| viewerHeight: 300

from shiny.express import ui

welcome = """
**Hello!** How can I help you today?

Here are a couple suggestions:

* <span class="suggestion">Tell me a joke</span>
* <span class="suggestion submit">Tell me a story</span>
"""

chat = ui.Chat(id="chat")
chat.ui(messages=[welcome])

@chat.on_user_submit
async def _(user_input: str):
    await chat.append_message(f"You said: {user_input}")
Suggestions are a great way to help guide users throughout a multi-turn conversation (for real examples, see here). To accomplish this, you’ll need to instruct the AI how to generate suggestions itself. We’ve found that adding a section like the one below to your system_prompt to be effective for this:
## Showing prompt suggestions

If you find it appropriate to suggest prompts the user might want to write, wrap the text of each prompt in `<span class="suggestion">` tags.
Also use "Suggested next steps:" to introduce the suggestions. For example:

```
Suggested next steps:

1. <span class="suggestion">Suggestion 1.</span>
2. <span class="suggestion">Suggestion 2.</span>
3. <span class="suggestion">Suggestion 3.</span>
```Input suggestions can also things other than text, like images or cards. To create one, supply a data-suggestion attribute with the suggestion text on the desired HTML element. As shown below, we highly recommend using a ui.card() in this scenario – it should be fairly obvious to the user that it’s clickable, and comes with a nice hover effect.
#| '!! shinylive warning !!': |
#|   shinylive does not work in self-contained HTML documents.
#|   Please set `embed-resources: false` in your metadata.
#| standalone: true
#| components: [editor, viewer]
#| layout: vertical
#| viewerHeight: 400
#| editorHeight: 300

## file: app.py
from shiny import reactive
from shiny.express import expressify, ui
from suggestions import card_suggestions

with ui.hold() as suggestions:
    card_suggestions()

welcome = f"""
**Hello!** How can I help you today?

Here are a couple suggestions:

{suggestions[0]}
"""

chat = ui.Chat(id="chat")
chat.ui(messages=[welcome])

@chat.on_user_submit
async def _(user_input: str):
    await chat.append_message(f"You said: {user_input}")

## file: suggestions.py
from shiny.express import expressify, ui

@expressify
def card_suggestion(title: str, suggestion: str, img_src: str, img_alt: str):
    with ui.card(data_suggestion=suggestion):
        ui.card_header(title)
        ui.fill.as_fill_item(
            ui.img(
                src=img_src,
                alt=img_alt,
            )
        )

@expressify
def card_suggestions():
    with ui.layout_column_wrap(height=200):
        card_suggestion(
            title="Learn Python",
            suggestion="Teach me Python",
            img_src="https://upload.wikimedia.org/wikipedia/commons/c/c3/Python-logo-notext.svg",
            img_alt="Python logo",
        )
        card_suggestion(
            title="Learn R",
            suggestion="Teach me R",
            img_src="https://upload.wikimedia.org/wikipedia/commons/1/1b/R_logo.svg",
            img_alt="R logo",
)Any suggestion can be auto-submitted by holding Ctrl/Cmd when clicking on it. Morever, you can opt-out of auto-submitting any suggestion by holding Alt/Option when clicking on a suggestion.
Update input
Input suggestions are a great starting point for recommending input to user, but more advanced use cases may require programmatically updating the user input. With chat.update_user_input(), you can change placeholder text, the input value, and even focus or submit that value on the user’s behalf.
For example, the app below collects some user input through a set of inputs in the sidebar, which effectively just prepopulates the starting user prompt, which the user can then further modify as they see fit:

The app above is available as a template:
shiny create --template data-sci-adventure \
    --github posit-dev/py-shiny-templates/gen-ai
Interactive messages
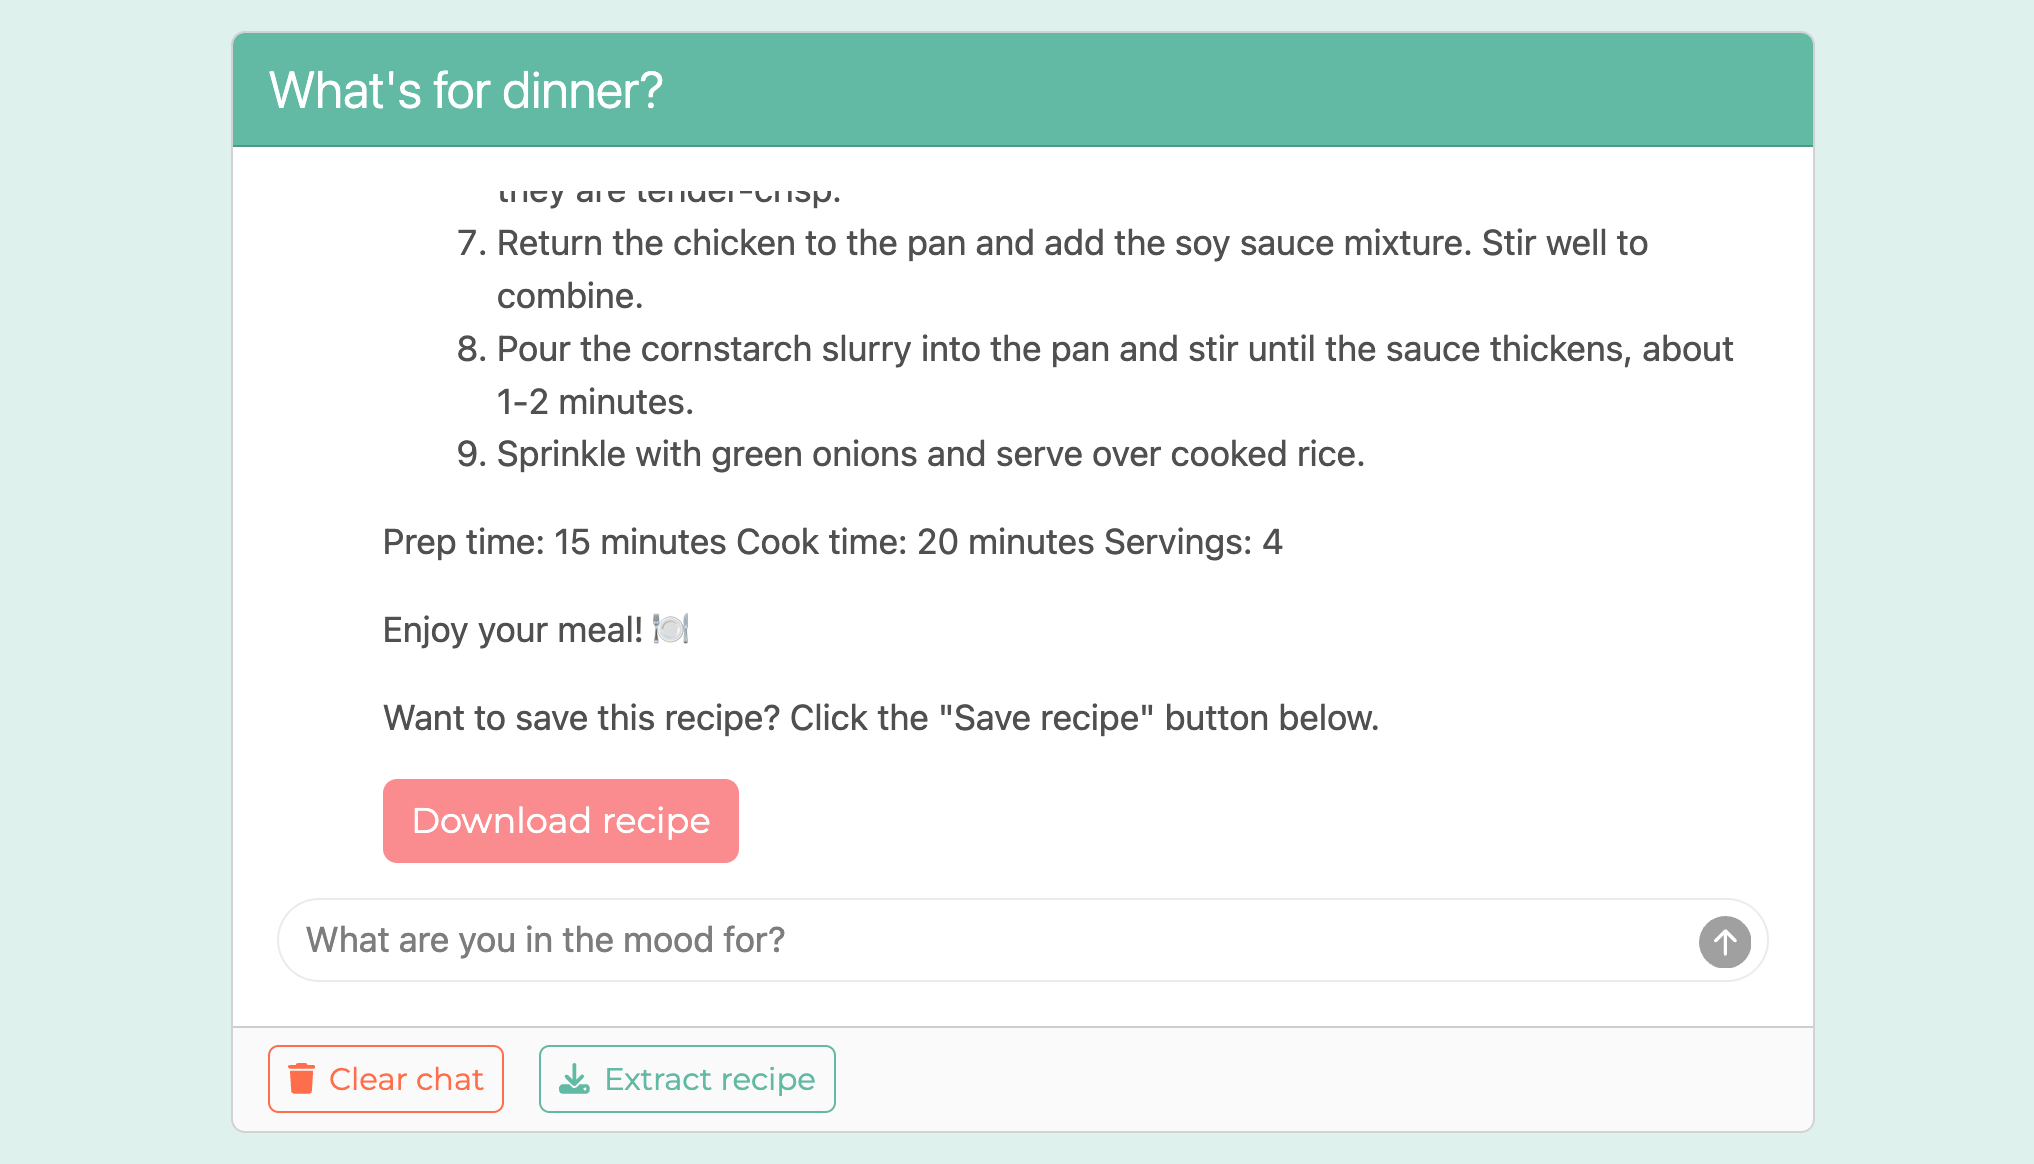
Messages can contain Shiny UI elements like inputs, outputs, etc. This allows you to collect user input, display rich interactive output (e.g., Jupyter Widgets), or provide additional context (e.g. tooltips) from within the chat.
For example, in the “What’s for Dinner?” app, when the user requests to extract recipe, a message is shown with a human readable version of recipe, as well as a download button to get the recipe in a structured JSON format:
The app above is available as a template:
shiny create --template dinner-recipe \
    --github posit-dev/py-shiny-templates/gen-ai
For a more basic example, here’s a startup message with an input field:
#| '!! shinylive warning !!': |
#|   shinylive does not work in self-contained HTML documents.
#|   Please set `embed-resources: false` in your metadata.
#| standalone: true
#| components: [editor, viewer]
#| layout: vertical
#| viewerHeight: 300
from shiny.express import ui

with ui.hold() as welcome:
    "**Hello!** What's your name?"
    ui.input_text("name", None, placeholder="Enter name here")

chat = ui.Chat(id="chat")
chat.ui(messages=[welcome])Probably the most interesting way in which interactive messages can be used is from a custom tool call display. For example, you could have a tool that displays a Data Grid or Jupyter Widget (e.g., a plotly graph).
Message streams
Non-blocking streams
Under-the-hood, .append_message_stream() launches a non-blocking extended task. This allows the app to be responsive while the AI generates the response, even when multiple concurrent users are on a single Python process.
A few other benefits of an extended task is that they make it easy to:
- Reactively read for the
.result(). - Reactively read for the
.status(). .cancel()the stream.
To grab the latest message stream, read the .latest_message_stream property on the chat object. This property always points to the most recent message stream, making it easy to work with it in a reactive context. Here’s an example of reactively reading the status and result of the latest message stream:
#| '!! shinylive warning !!': |
#|   shinylive does not work in self-contained HTML documents.
#|   Please set `embed-resources: false` in your metadata.
#| standalone: true
#| components: [editor, viewer]
#| layout: vertical
#| viewerHeight: 350
#| editorHeight: 300

## file: app.py
from app_utils import stream_generator
from shiny.express import render, ui

chat = ui.Chat("chat")

@render.code
def stream_status():
    return f"Status: {chat.latest_message_stream.status()}"

chat.ui(placeholder="Type anything here and press Enter")

@render.text
async def stream_result():
    return f"Result: {chat.latest_message_stream.result()}"

@chat.on_user_submit
async def _(message: str):
    await chat.append_message_stream(stream_generator())

## file: app_utils.py
import asyncio

async def stream_generator():
    for i in range(5):
        await asyncio.sleep(0.5)
        yield f"Message {i} \n\n"
Providing good UI/UX for canceling a stream is a bit more involved, but it can be done with a button that cancels the stream and notifies the user. See the example below for an approach to this:
#| '!! shinylive warning !!': |
#|   shinylive does not work in self-contained HTML documents.
#|   Please set `embed-resources: false` in your metadata.
#| standalone: true
#| components: [editor, viewer]
#| layout: vertical
#| viewerHeight: 350
#| editorHeight: 300

## file: app.py
from app_utils import stream_generator

from shiny import reactive
from shiny.express import input, ui

ui.input_action_button(
    "cancel",
    "Cancel stream",
    class_="btn btn-danger",
)

chat = ui.Chat("chat")
chat.ui(placeholder="Type anything here and press Enter")

@chat.on_user_submit
async def _(message: str):
    await chat.append_message_stream(stream_generator())

@reactive.effect
@reactive.event(input.cancel)
def _():
    chat.latest_message_stream.cancel()
    ui.notification_show("Stream cancelled", type="warning")

@reactive.effect
def _():
    ui.update_action_button(
        "cancel",
        disabled=chat.latest_message_stream.status() != "running"
    )


## file: app_utils.py
import asyncio

async def stream_generator():
    for i in range(3):
        await asyncio.sleep(0.75)
        yield f"Message {i} \n\n"
Streaming context
An alternative way to append a streaming messages is through the .message_stream_context() context manager. Compared to .append_message_stream(), it provides a bit more control over the stream’s lifecycle and content, but has the downside of not being non-blocking by default. You’ll find it useful when you want to:
- Overwrite/replace content that already exists in a message.
- Insert a new stream inside an existing stream.
The example below demonstrates both of these use cases. Note how the inner stream is used to show progress, and the outer stream is used to provide context:
#| '!! shinylive warning !!': |
#|   shinylive does not work in self-contained HTML documents.
#|   Please set `embed-resources: false` in your metadata.
#| standalone: true
#| components: [editor, viewer]
#| layout: vertical
#| viewerHeight: 250
#| editorHeight: 300
import asyncio

from shiny import reactive
from shiny.express import input, ui

welcome = f"""
**Hello!** Press the button below to append a stream.

{ui.input_task_button("do_stream", "Stream", class_="btn btn-primary")}
"""

chat = ui.Chat(id="my_chat")
chat.ui(messages=[welcome])

@reactive.effect
@reactive.event(input.do_stream)
async def _():
    async with chat.message_stream_context() as outer:
        await outer.append("Starting stream 🔄...\n\nProgress:")
        async with chat.message_stream_context() as inner:
            for x in [0, 50, 100]:
                await inner.replace(f" {x}%")
                await asyncio.sleep(1)
        await outer.replace("Completed stream ✅")
As you’ll learn in tool calling, a .message_stream() can also be nested inside an non-blocking .append_message_stream(), which is primarily useful for showing tool progress/results.
Troubleshooting
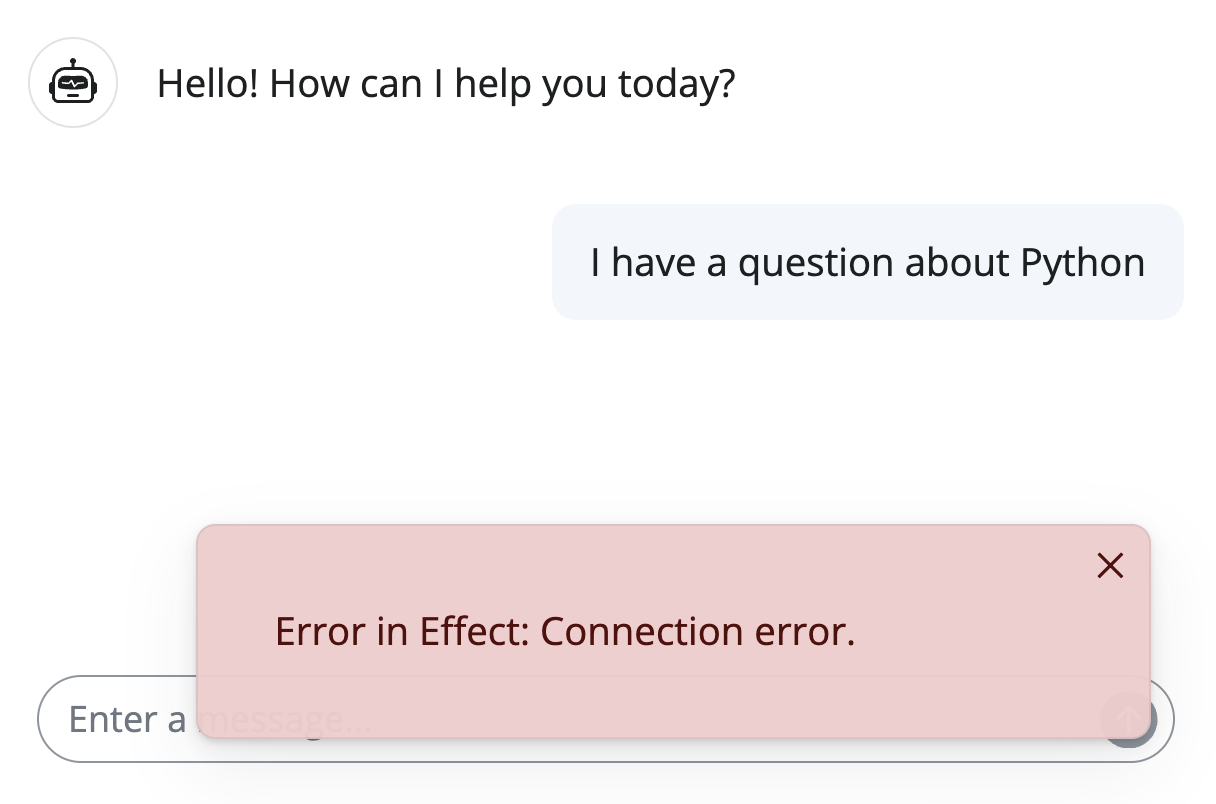
Error handling
When an error occurs in the @chat.on_user_submit callback, the app displays a dismissible notification about the error. When running locally, the actual error message is shown, but in production, only a generic message is shown (i.e., the error is sanitized since it may contain sensitive information). If you’d prefer to have errors stop the app, that can also be done through the on_error argument of Chat (see the documentation for more information).
Another way to handle error is to catch them yourself and append a message to the chat. This way, you can might provide a better experience with “known” errors, like when the user enters an invalid/unexpected input:
def format_as_error(x: str):
    return f'<span class="text-danger">{x}</span>'

@chat.on_user_submit
async def _(user_input: str):
    if not user_input.startswith("http"):
        msg = format_as_error("Please enter a valid URL")
        return await chat.append_message(msg)

    try:
        contents = scrape_page_with_url(input)
    except Exception:
        msg = "I'm sorry, I couldn't extract content from that URL. Please try again."
        return await chat.append_message(format_as_error(msg))

    response = await chat_client.stream_async(contents)
    await chat.append_message_stream(response)
Debugging
Sometimes response generation from an LLM might not be quite what you expect, leaving you to wonder what went wrong. With chatlas, your primary interactive debugging tool is to set echo="all" in the .stream_async() method to see the context of the chat history (emitted to your Python console). For lower-level debugging, you can also enable logging and/or access the full chat history via the chat_client.get_turns() method. For more, see chatlas’ troubleshooting guide.
Since chatlas builds on top of official Python SDKs like openai and anthropic, monitoring solutions that integrate with their logging mechanism can be used to monitor and debug your chatbot in production.
Message history
The chat.messages() method returns a tuple of all the messages appended after startup. Use this if you want to obtain a record of messages as they appear in the UI. This makes implementing something like download feature easy:
#| '!! shinylive warning !!': |
#|   shinylive does not work in self-contained HTML documents.
#|   Please set `embed-resources: false` in your metadata.
#| standalone: true
#| components: [editor, viewer]
#| layout: vertical
#| viewerHeight: 375
import json
from shiny.express import render, ui

ui.page_opts(fillable=True, fillable_mobile=True)

chat = ui.Chat("chat")

chat.ui(messages=["Welcome!"])

@render.download(filename="messages.json", label="Download messages")
def download():
    yield json.dumps(chat.messages())

@chat.on_user_submit
async def _(user_input: str):
await chat.append_message(f"You said: {user_input}")Beware that chat.messages() only returns only the content sent to the UI, not necessarily the full message content sent/returned by the LLM. This means, if your chat history contains “background” context, you may instead want that full back-end message history. Note that with chatlas, you can access and set that additional context via the .get_turns() and .set_turns() methods on the chat_client.
For a more advanced example of how you can combine reactivity with chat.messages() to add a “New chat” button with a dropdown to select previous chats, see the example below:
#| '!! shinylive warning !!': |
#|   shinylive does not work in self-contained HTML documents.
#|   Please set `embed-resources: false` in your metadata.
#| standalone: true
#| components: [editor, viewer]
#| layout: vertical
#| viewerHeight: 400
#| editorHeight: 400

from datetime import datetime
from faicons import icon_svg
from shiny import reactive
from shiny.express import input, render, ui

ui.page_opts(fillable=True, fillable_mobile=True)

chat = ui.Chat(id="chat")
chat.ui(messages=["**Hello!** How can I help you today?"])

with ui.layout_columns(fill=False):
    ui.input_action_button("new", "New chat", icon=icon_svg("plus"))

    @render.express
    def history_ui():
        if not history():
            return
        choices = list(history().keys())
        choices_dict = dict(zip(choices, choices))
        ui.input_select(
            "previous_chat", None,
            choices={"": "Choose a previous chat", **choices_dict}
        )


@chat.on_user_submit
async def _(user_input: str):
    await chat.append_message(f"You said: {user_input}")

# Track chat history
history = reactive.value({})

# When a new chat is started, add the current chat messages
# to the history, clear the chat, and append a new start message
@reactive.effect
@reactive.event(input.new)
async def _():
    stamp = datetime.now().strftime("%Y-%m-%d %H:%M:%S")
    hist = {**history(), stamp: chat.messages()}
    history.set(hist)
    await chat.clear_messages()
    await chat.append_message(f"Chat started at {stamp}")

# When a previous chat is selected, clear the current chat,
# and append the messages from the selected chat
@reactive.effect
@reactive.event(input.previous_chat)
async def _():
    if not input.previous_chat():
        return
    msgs = history()[input.previous_chat()]
    await chat.clear_messages()
    for msg in msgs:
        await chat.append_message(msg)
Monitoring AI Applications
When deploying AI chatbots to production, OpenTelemetry tracing provides valuable insights:
- Track latency and token usage for LLM API calls
- Monitor error rates and identify failing prompts
- Understand user interaction patterns
- Debug issues without accessing production logs
Many observability platforms like Logfire can automatically instrument AI libraries (OpenAI, Anthropic, etc.) to show API calls nested within your Shiny traces.
Next steps
The next article covers a more generic way to stream generative AI: the ui.MarkdownStream() component. This component is useful when you don’t want a full chat interface, but still want to stream in some content from an LLM.
Skip to other articles in the series if you want to learn about other generally useful Generative AI techniques like tool calls, structured output, and RAG.
Footnotes
This can be especially frustrating behavior since hosted apps, by default, will close a idle session after a certain (configurable) amount of time.↩︎
When server-side state can’t be fully determined by the UI’s
inputvalues alone, you’ll need to registeron_bookmarkandon_restorecallbacks to save and restore that server-state.↩︎