How to use DataTables in a Shiny App
Basic Usage
The DataTables application demonstrates HTML tables using the jQuery library DataTables.

To build DataTables in R, we recommend using the DT package (http://rstudio.github.io/DT/):
library(DT)The basic usage is to create an output element in the UI using DT::dataTableOutput(id = 'foo'), and render a table on the server side using output$foo <- DT::renderDataTable({ data }). Normally renderDataTable() takes an expression that returns a rectangular data object with column names, such as a data frame or a matrix.
Note: Both shiny and DT packages have functions named dataTableOutput and renderDataTable. The shiny::renderDataTable function provides the server-side version of DataTables (using R to process the data object on the server side), while DT::renderDataTable allows you to create both server-side and client-side DataTables, and supports additional DataTables features. Hence we recommend using functions from the DT package when building DataTables in your Shiny app.
Below is a minimal example:
library(DT)

ui <- basicPage(
  h2("The mtcars data"),
  DT::dataTableOutput("mytable")
)

server <- function(input, output) {
  output$mytable = DT::renderDataTable({
    mtcars
  })
}

shinyApp(ui, server)
By default, the data is paginated, showing 10 rows per page. The number of rows to display can be changed through the drop down menu in the top-left. We can sort the columns by clicking on the column headers, and sort multiple columns by holding the Shift key while clicking (the sorting direction loops through ascending, descending, and none if we keep on clicking). We can search globally in the table using the text input box in the top-right, or search individual columns using the text boxes at the bottom. Currently the searching terms are treated as regular expressions in R. Since searching can be time-consuming in large datasets, there is a delay of 0.5 seconds (customizable) before searching is really processed; that means if we type fast enough in the search box, searching may be processed only once on the server side even if we have typed more than one character.
Customizing DataTables
There are a large number of options in DataTables that are customizable (see its website for details). In this example, we show a few possibilities. Here is the code for the entire app:
library(shiny)
library(ggplot2)  # for the diamonds dataset

ui <- fluidPage(
  title = "Examples of DataTables",
  sidebarLayout(
    sidebarPanel(
      conditionalPanel(
        'input.dataset === "diamonds"',
        checkboxGroupInput("show_vars", "Columns in diamonds to show:",
                           names(diamonds), selected = names(diamonds))
      ),
      conditionalPanel(
        'input.dataset === "mtcars"',
        helpText("Click the column header to sort a column.")
      ),
      conditionalPanel(
        'input.dataset === "iris"',
        helpText("Display 5 records by default.")
      )
    ),
    mainPanel(
      tabsetPanel(
        id = 'dataset',
        tabPanel("diamonds", DT::dataTableOutput("mytable1")),
        tabPanel("mtcars", DT::dataTableOutput("mytable2")),
        tabPanel("iris", DT::dataTableOutput("mytable3"))
      )
    )
  )
)

server <- function(input, output) {

  # choose columns to display
  diamonds2 = diamonds[sample(nrow(diamonds), 1000), ]
  output$mytable1 <- DT::renderDataTable({
    DT::datatable(diamonds2[, input$show_vars, drop = FALSE])
  })

  # sorted columns are colored now because CSS are attached to them
  output$mytable2 <- DT::renderDataTable({
    DT::datatable(mtcars, options = list(orderClasses = TRUE))
  })

  # customize the length drop-down menu; display 5 rows per page by default
  output$mytable3 <- DT::renderDataTable({
    DT::datatable(iris, options = list(lengthMenu = c(5, 30, 50), pageLength = 5))
  })

}

shinyApp(ui, server)
ui
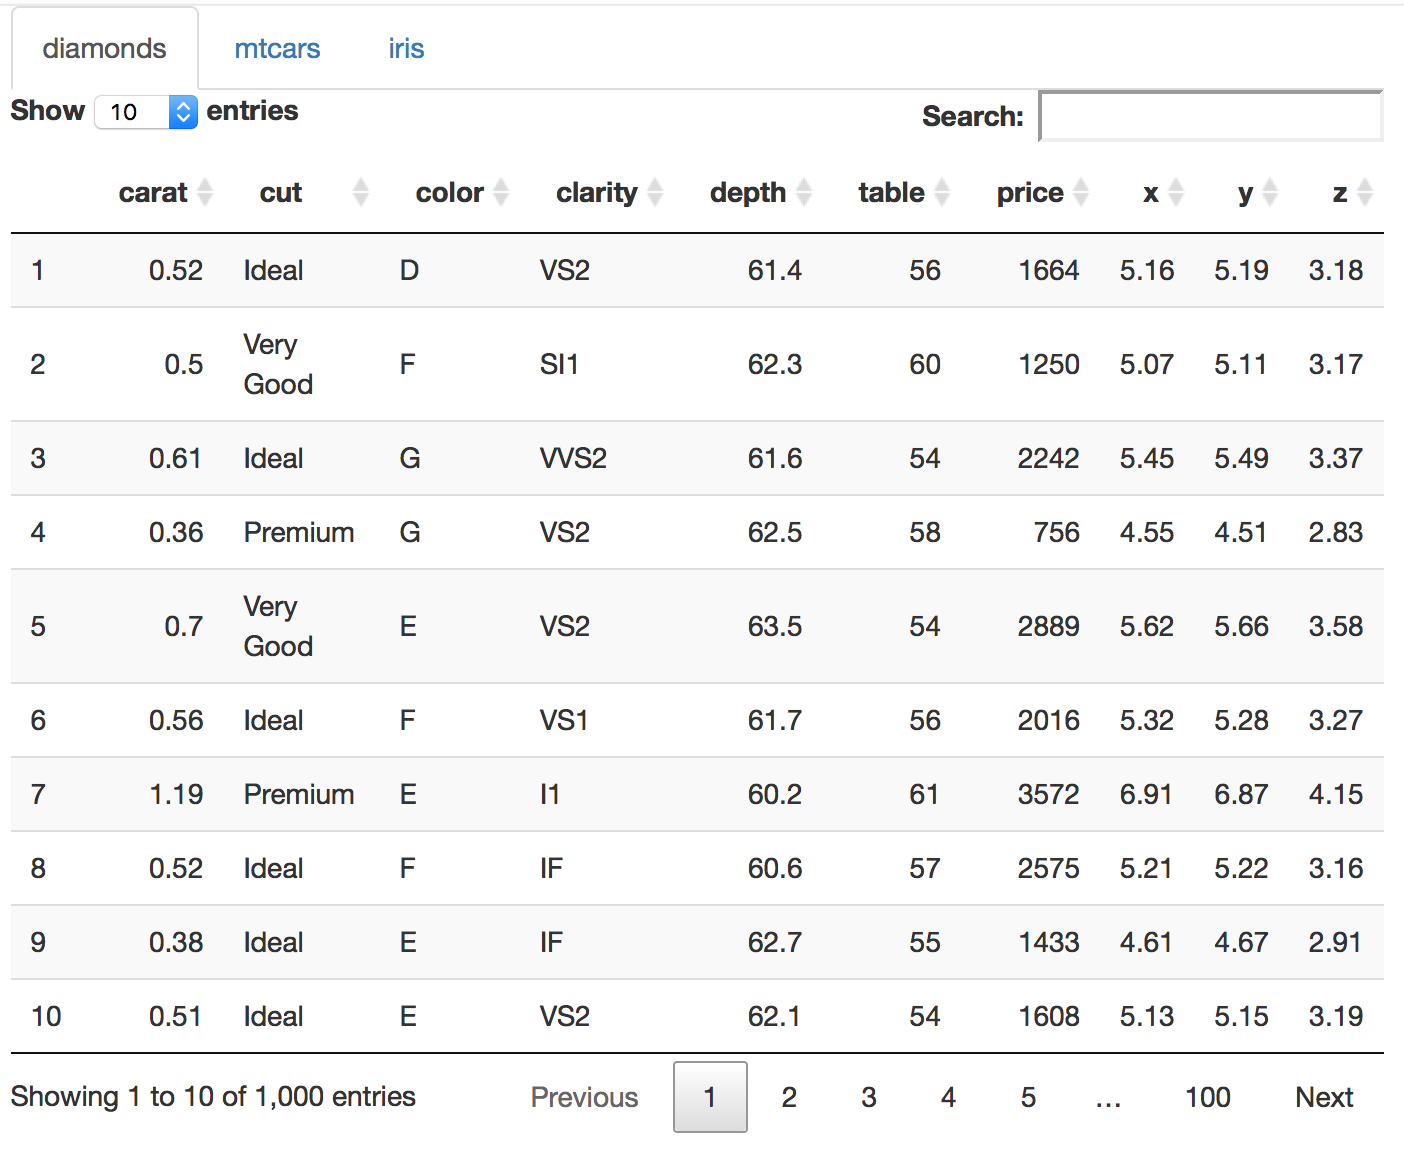
First, we created the UI to display three datasets diamonds, mtcars, and iris, with each dataset in its own tab. We also added a checkbox group to select the columns to show in the diamonds data.
server
The options argument in renderDataTable() can take a list (literally an R list) of options, and pass them to DataTables when the table is initialized. For example, for the mtcars data, we pass orderClasses = TRUE to DataTables so that the sorted columns will have CSS classes attached on them (this is disabled by default); in this example, we can see the sorted columns are highlighted by darker colors. For the iris data, we pass the options lengthMenu and pageLength to customize the drop down menu, which has items [10, 25, 50, 100] by default; now the menu has three items [5, 30, 50], and 5 is selected as the default value.
For more DataTable options, please refer to its full reference on its website.
Upgrading from DataTables v1.9 to v1.10
Shiny (>= v1.10.2) currently uses DataTables v1.10. If you have used DataTables in Shiny before (specifically, before Shiny v0.10.2), you may need to change some parameter names for your DataTables, because Shiny (<= v0.10.1) was using DataTables v1.9, and DataTables v1.10 has changed the parameter names.
A guide for upgrading parameter names from DataTables 1.9 to 1.10 is here: https://datatables.net/upgrade/1.10-convert. Shiny will try to automatically correct some of the old parameter names, but this automatic correction certainly will not work for all use cases, especially if you have deeply customized your DataTables using complicated JavaScript options. You can see this GIT commit for examples of converting DataTables 1.9 names to 1.10 names.