Using sliders
Shiny slider controls are extremely capable and customizable. Features supported include the ability to input both single values and ranges, custom formats for value display (e.g for currency), and the ability to animate the slider across a range of values.
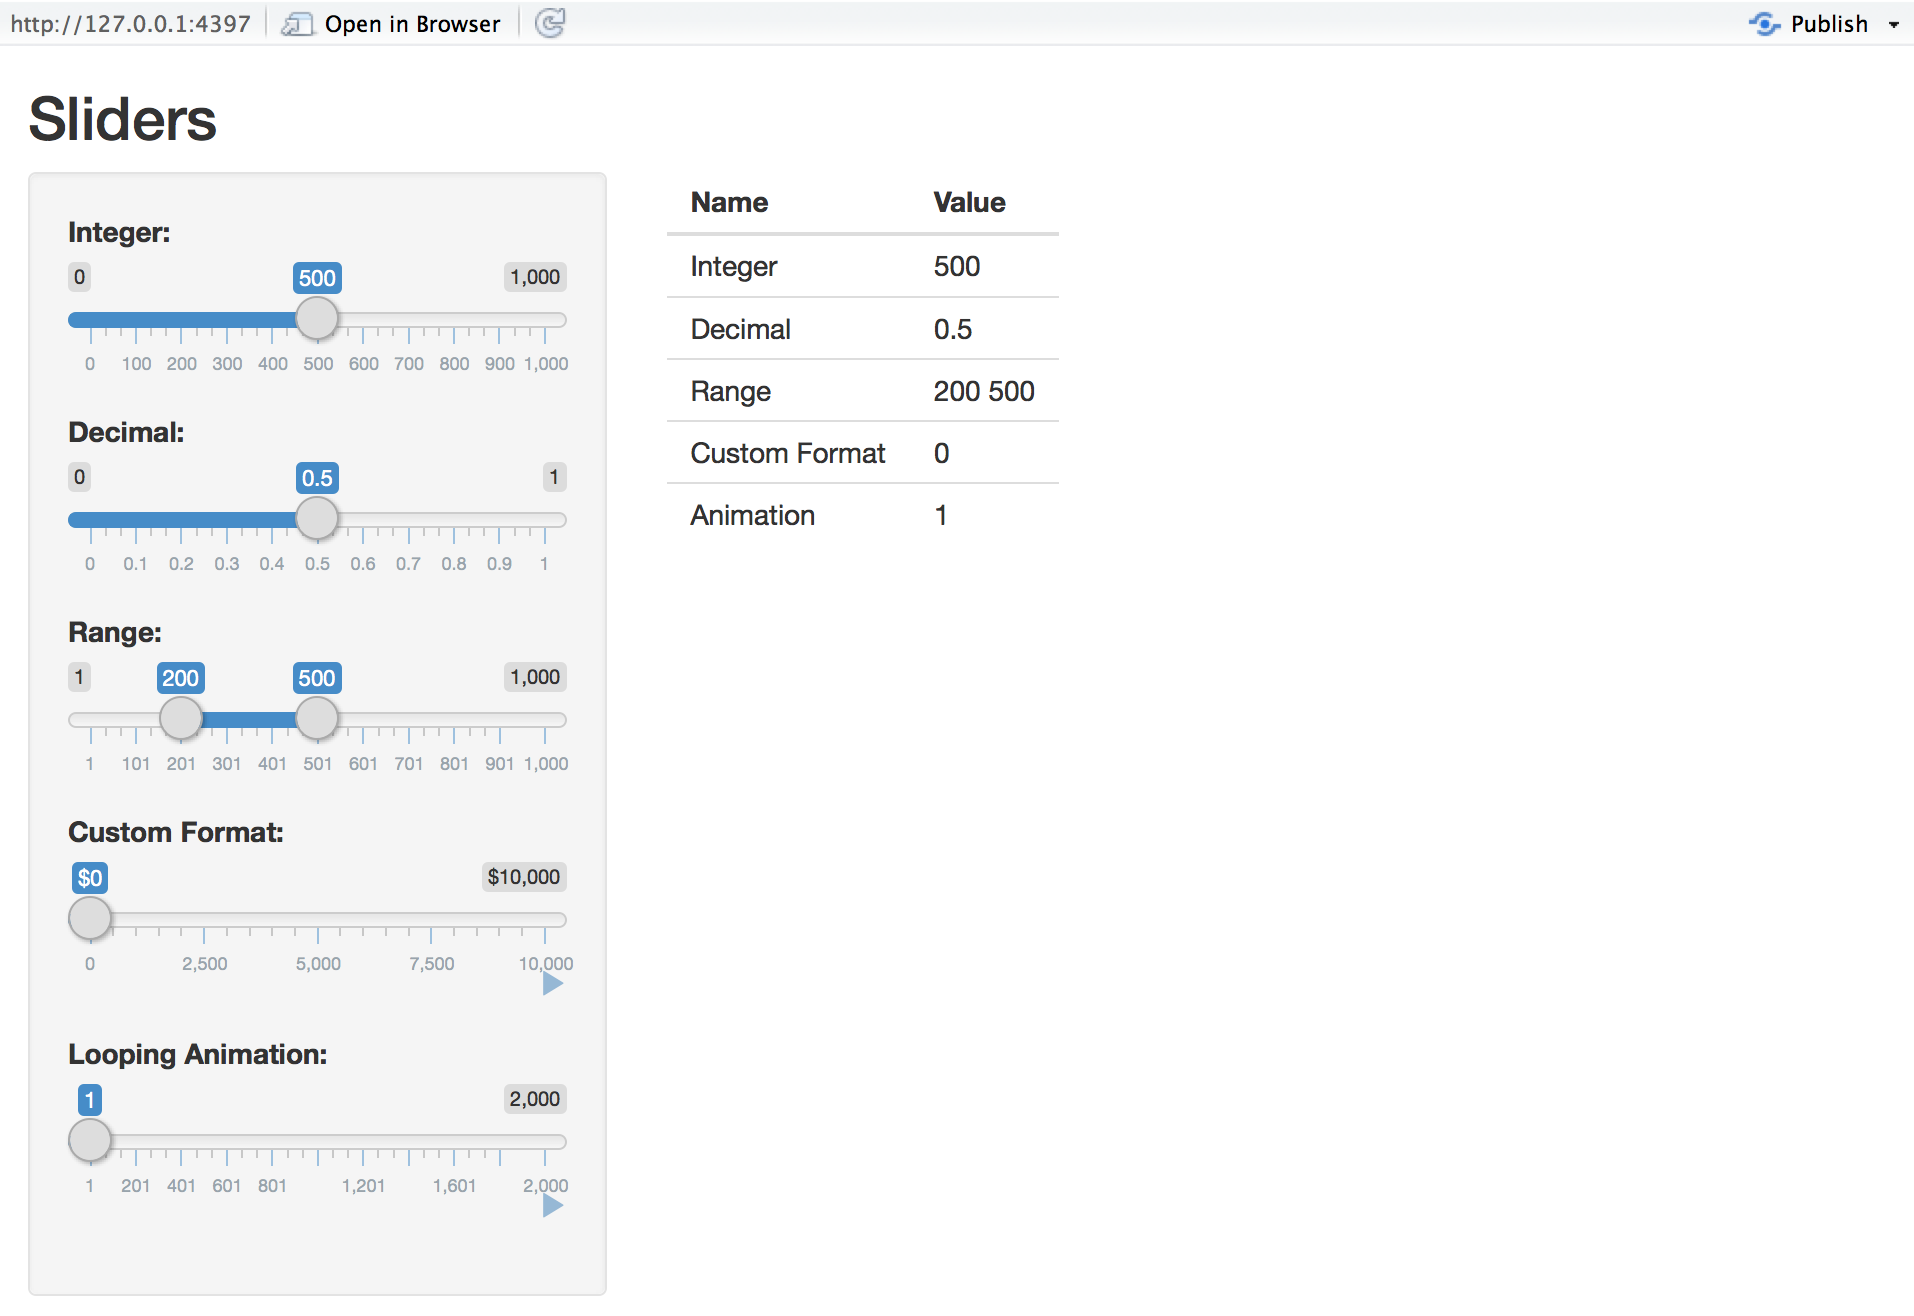
The Sliders app demonstrates the many capabilities of slider controls, including the ability to run an animation sequence.

To run the example locally type:
library(shiny)
runExample("05_sliders")
Customizing Sliders
Shiny slider controls are extremely capable and customizable. Features supported include:
- The ability to input both single values and ranges
- Custom formats for value display (e.g for currency)
- The ability to animate the slider across a range of values
Slider controls are created by calling the sliderInput function. The UI demonstrates using sliders with a variety of options:
ui
# Define UI for slider demo app ----
ui <- fluidPage(

  # App title ----
  titlePanel("Sliders"),

  # Sidebar layout with input and output definitions ----
  sidebarLayout(

    # Sidebar to demonstrate various slider options ----
    sidebarPanel(

      # Input: Simple integer interval ----
      sliderInput("integer", "Integer:",
                  min = 0, max = 1000,
                  value = 500),

      # Input: Decimal interval with step value ----
      sliderInput("decimal", "Decimal:",
                  min = 0, max = 1,
                  value = 0.5, step = 0.1),

      # Input: Specification of range within an interval ----
      sliderInput("range", "Range:",
                  min = 1, max = 1000,
                  value = c(200,500)),

      # Input: Custom currency format for with basic animation ----
      sliderInput("format", "Custom Format:",
                  min = 0, max = 10000,
                  value = 0, step = 2500,
                  pre = "$", sep = ",",
                  animate = TRUE),

      # Input: Animation with custom interval (in ms) ----
      # to control speed, plus looping
      sliderInput("animation", "Looping Animation:",
                  min = 1, max = 2000,
                  value = 1, step = 10,
                  animate =
                    animationOptions(interval = 300, loop = TRUE))

    ),

    # Main panel for displaying outputs ----
    mainPanel(

      # Output: Table summarizing the values entered ----
      tableOutput("values")

    )
  )
)
Server Script
The server side of the Slider application is very straightforward – it creates a data frame containing all of the input values and then renders it as an HTML table:
server
# Define server logic for slider examples ----
server <- function(input, output) {

  # Reactive expression to create data frame of all input values ----
  sliderValues <- reactive({

    data.frame(
      Name = c("Integer",
               "Decimal",
               "Range",
               "Custom Format",
               "Animation"),
      Value = as.character(c(input$integer,
                             input$decimal,
                             paste(input$range, collapse = " "),
                             input$format,
                             input$animation)),
      stringsAsFactors = FALSE)

  })

  # Show the values in an HTML table ----
  output$values <- renderTable({
    sliderValues()
  })

}